Saturday, March 31, 2012

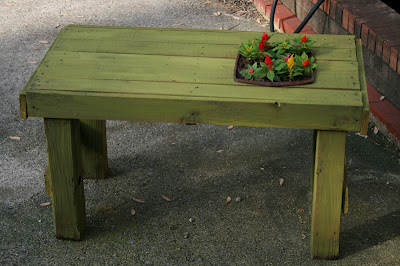
Small Wooden Pallet Table

I have seen so many awesome ideas for wooden pallets recently from various sources. My husband said that he could get free pallets from work so I decided to try my hand at a project today. I went with a small pallet table for near my pool area. It was fairly easy and only took a few hours from start to finish.


My husband got about 15 pallets from work and we used some to make a raised garden bed which I will be posting about tomorrow. Pick a pallet that has nice and even wood planks on top so the top of your table will be smooth and even.


I cut one pallet in half with my circular saw to start with.


After you have your length and width determined find a pot or basin to fit inside the pallet top. You will want to cut a hole in the top layer of the pallet about 1/4 smaller than the rim of the basin so the lip of the basin will rest on the wood.


I know this sounds really dumb but the only thing I could find laying around that was the perfect size was the wash basin I was given in the hospital when I had my son. Whatever works, right?


For the legs you will need a 4x4x8' post. Cut this into 4- 2 foot sections with your saw.


Get your level our and make sure they are all even so you don't have a wobbly table. It would be a tragedy to knock over a mojito or pina colada in the heat of summer :)


nail all of the legs together through the tops and the sides. You should have a minimum of four nails in each leg.


In the mean time take a picture of any cute babies laying around your backyard.


Next I broke off 4 slats from the other half of the pallet to use as a border and stability pieces for the table. The slats should already be the length of the table to just nail them on for a trim piece.


Here is the table on its side the the trim piece goes around the top. (I hope this makes sense)


Once you have the trim and stability pieces on paint the table and add your basin. Voila!!


Brittney

Tuesday, March 20, 2012

So Yummy In My Tummy!

One of my friends recently posted on Facebook a Paleo friendly fruit crisp with these directions:

3 cups of fresh or frozen fruit (I used frozen blueberries), 1 egg, 1 1/2 cups almond meal, 2 tbsp coconut oil, 2 tbsp cinnamon, honey......oven@350, put fruit on bottom of pie dish and drizzle with honey, mix egg, almond meal, coconut oil, and cinnamon in bowl.......by hand crumble the mixture over the fruit, bake in oven for 35 minutes...I put about 1/4 cup of coconut milk in the bottom of my bowl and put my serving of the cobbler in the milk, it was excellent but next time I think I'll serve with frozen vanilla yogurt.
I decided that I had to try it because it looked so yummy. I modified a few things so here is what I did.


First of all I decided to serve mine with frozen banana yogurt. Simply take 3-4 bananas and cut them into 1/2 inch slices and freeze them for 2-3 hours until they are solid.


 In the mean time you will need the following:
1 cup Bob's Red Mill GF almond meal/flour
1/4 cup pure maple syrup
3/4 cup dehydrated chopped coconut(unsweetened)
2 cups berries of choice
3 tablespoons of coconut oil


 Chop berries and place in bottom of baking dish add 1/8 cup of the maple syrup and just toss around the berries.

 In a separate bowl combine 1/2 of coconut and all of the flour.

 Add melted coconut oil and 1/8 cup of the maple syrup. Mix together and it should resemble a crumbly fruit topping. Put the topping over the fruit and bake at 350 degrees for 15-20 minutes until golden brown on top.


Voila! It should smell amazing and look a little something like this.

After the time has passed for the bananas throw them in the blender or food processor and start pulsing. You will have to scrape the sides several times and move the bananas around. They will start to get crumbly looking. That is good.

Keep going

50 pulses or so later, the bananas should look a little something like this. I put mine in the freezer for about 15-20 minutes to firm it up a bit and then serve it with your fruit crisp.


 So Yummy!
There you have it. Paleo friendly, gluten free, vegan dessert. 


Brittney

Sunday, March 18, 2012

Our Weekend Recap

This past weekend we went to visit my family. It was such a great few days spent with wonderful people. Mason was trying to crawl and got a new car seat. I pushed him in our first 5k together and finished in 33 minutes even with a flat tire that I didn't know about until after the race. My sweet sister in law gave us a tour of the ECU campus and we had bubble tea together for the first time. To finish the day off we grilled burgers, made a fire, drank some wine, and relaxed.


Mason wants to crawl so bad and he is just, "one knee in front of the other" away.


Mason has outgrown his little man car seat by about 5 pounds so we had to bump him up to the big man chair.


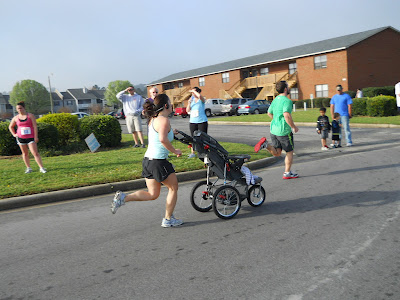
Mama and Mason's first 5k since he has been out of the womb.


Grandma supporting us!

More of our support team!


At the finish line

Wheeewwww! Water please....


Had my first bobba or bubble tea today! It was coffee flavored. I think I would have liked it better if the tapioca balls were flavored somehow or if the coffee was stronger. However, something has been crossed off of my bucket list.


Brittney

Wednesday, March 14, 2012

Glazed Trout With Mushrooms, Spinach and Squash


Whew, I was so busy these past few days and I realized I had not posted anything since the 9th. I am slacking! My husband and I are in the process of cleaning out our cabinets and converting over to an unprocessed diet. At this time I can't really call it Paleo because we are not quite there yet, however, that is our goal. When we started this conversion last week I told my hubby one of the main things that he could not have was white potatoes. He agreed even though he is a total meat and potatoes kind of guy. It was too funny because last night when we were serving dinner he did a look around the kitchen just to make sure he was not missing any potatoes :). I made a super delicious dinner with fresh water trout and veggies.

It looked a little something like this.


For the glaze: 3 cloves fresh garlic
2 inch section of fresh ginger
1/4 cup maple syrup
1/4 cup of soy sauce

Put it in mini food processor for a few pulses until blended and set it aside for a minute. Score the fish all over making little "pockets" for the glaze to seep into. Pour over the fish and bake on 300 degrees for about 25-30 minutes.


In the mean time, saute some mushrooms in water, fresh garlic and pepper.


I also sauteed organic spinach and used the vegetable peeler to shred some squash. I cooked it the same way with water, pepper and garlic.


It was so yummy once we actually got to dig in!


Do you have any beginner Paleo or unprocessed diet recipes or tips? Send them my way and I will post them to share with others!

Brittney

Friday, March 9, 2012

DIY Clutch


A nice clutch is always a welcomed addition to any wardrobe; especially on those nights out on the town when you don't want to have to worry about where to stash your bulky bag while you dance the night away. Here is a fun little tutorial for a simple clutch.
(P.S. This is also a great pattern to use for a diaper clutch. Just make sure your measurements can hold a diaper or two and a to-go wipes container.)

What you will need:
fabric for exterior- 20 x11"
fabric for interior lining- 20 x 11"
mid-heavy weight iron on stabilizer- 20 x 11"
sew on velcro
optional-exterior embellishments
 First things first. You need to cut your fabric into 20 x 11" rectangles and iron on the stabilizer to the wrong side of the liner fabric.

Next you will want to lay your exterior fabric right side down then lay the lining fabric right side up. Fold the bottom up and the top down so you can get an idea of where your velcro needs to be placed.

 Once you flip the top back up pin the velcro to the top portion of the clutch but on the liner fabric ONLY. Pin the next piece of velcro to the bottom of the clutch on the exterior fabric ONLY.

Sew your velcro on

This next step is optional if you would like to embellish the exterior in anyway go ahead and do so on the right side of the exterior fabric. I just added a little piece of leather to jazz it up.


With ride sides facing each other start at 1/4" down and sew down one long edge around the bottom and up the other long edge. Turn the clutch right side out and you should have something that looks like this. Iron all of your seams.

Fold the bottom of the clutch up and pin in place.

Fold the top seam down 1/4" and pin in place.


 Top stitch around the right side, across the top and then down the second side.


Once you are finished it should look a little something like this!


Make one in every size and color for any occasion or as a gift!

Thanks for stopping by. Send me pictures of your clutch!

Brittney